Blog

  • Cloudflare Mesh, Cloudflare One – High availability replica management for Cloudflare Mesh

    The Cloudflare Mesh dashboard now shows per-replica details for high availability nodes. You can see which replica is active, view each replica’s Mesh IP and connection details, and manually trigger failover — all from the node detail page.

    Mesh HA replica tabs showing active and passive replicas with per-replica Mesh IPs and a manual failover option

    What’s new

    • Replica tabs on the node detail page — switch between replicas to see each one’s Mesh IP, edge data center, origin IP, platform, version, and uptime.
    • Active/passive badges identify which replica is currently routing traffic.
    • Manual failover — promote a passive replica to active with a single click. The previous active replica switches to standby.
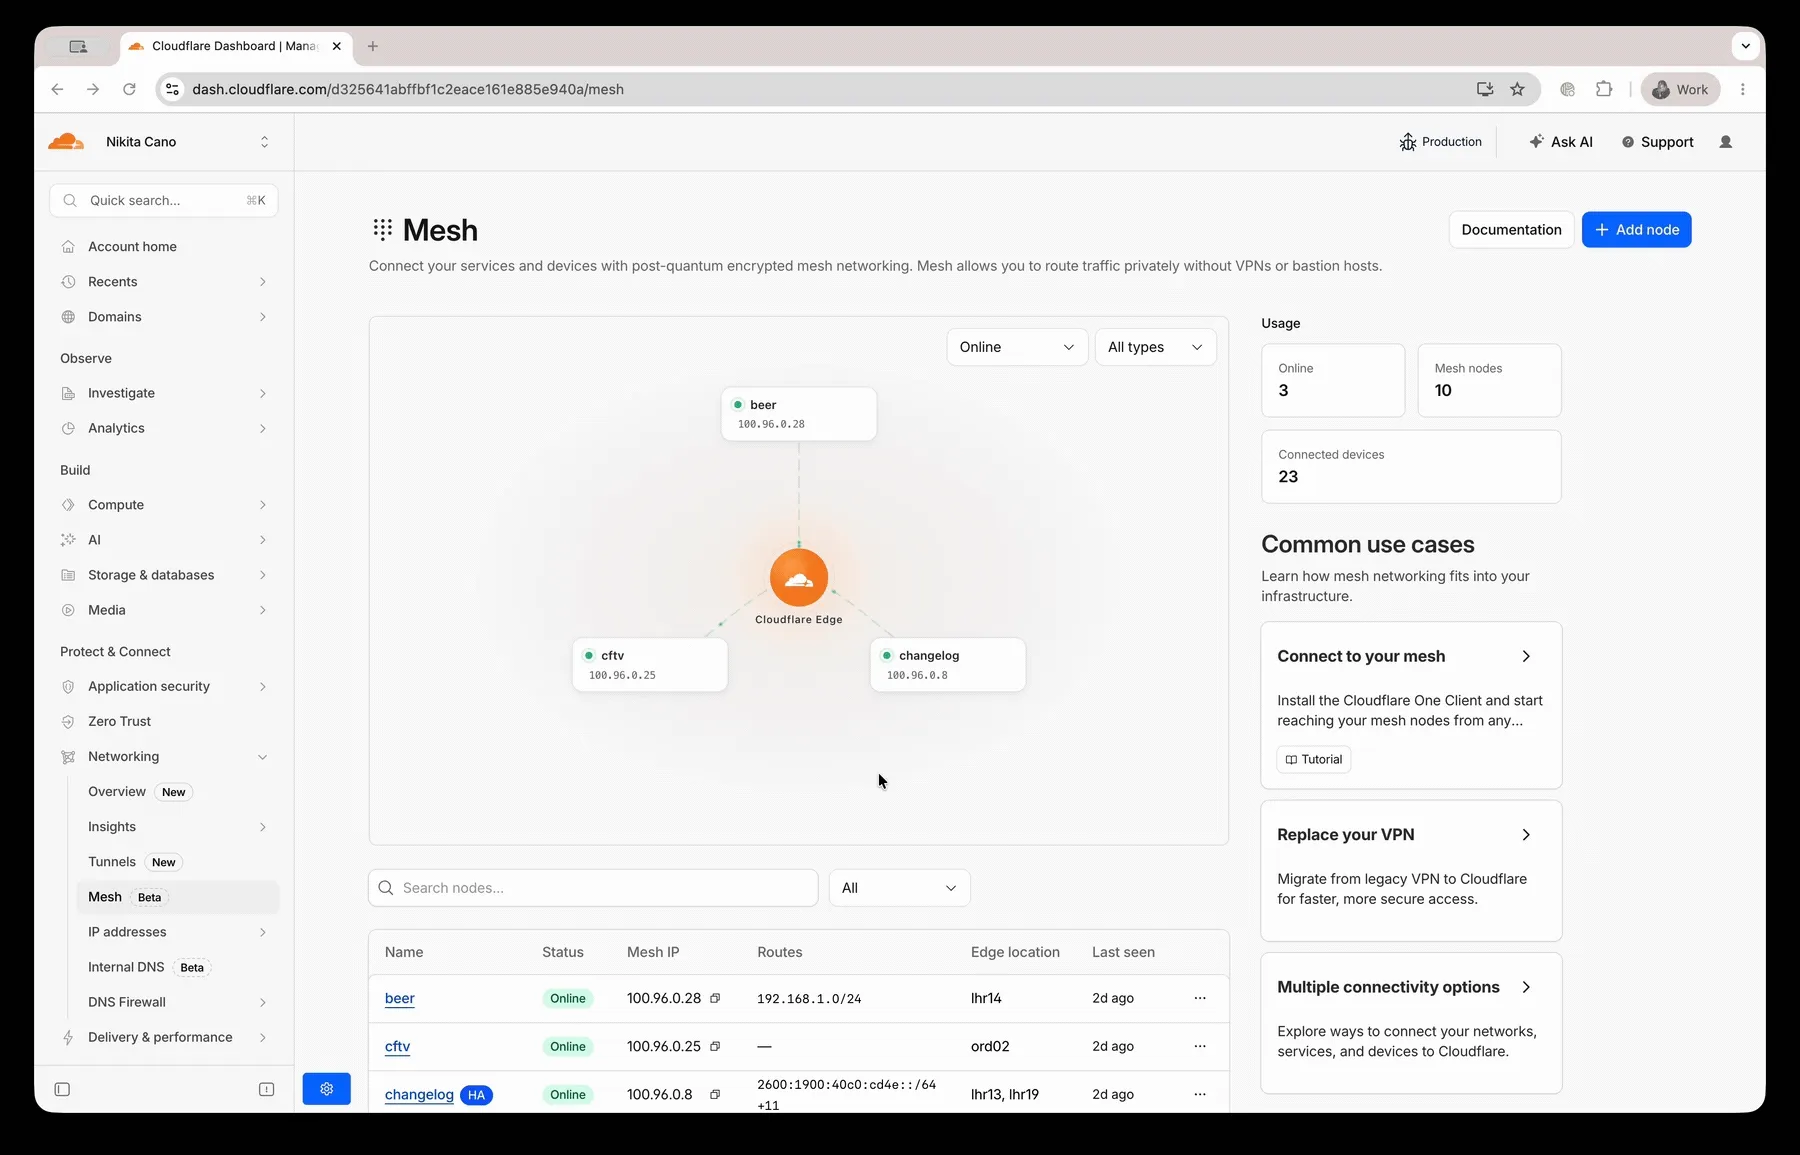
    • HA badge in the overview table identifies nodes running multiple replicas.
    • Active replica IP shown in the overview table — the dashboard now resolves which replica is active and displays the correct Mesh IP.

    Manual failover

    To manually promote a passive replica:

    1. In the Cloudflare dashboard, go to Networking > Mesh.
    2. Select an HA-enabled node.
    3. Select the passive replica tab.
    4. Select Promote to active and confirm.

    Traffic reroutes to the promoted replica immediately. Refer to High availability for details on failover behavior.

  • Browser Run – Use Browser Run Quick Actions directly from Workers

    You can now call Browser Run Quick Actions directly from a Cloudflare Worker using the quickAction() method on the browser binding. This simplifies how Workers interact with Browser Run by removing the need for API tokens or external HTTP requests. Your Worker communicates with Browser Run directly over Cloudflare’s network, resulting in simpler code and lower latency.

    With the quickAction() method you can:

    To get started, add a browser binding to your Wrangler configuration:

    • wrangler.jsonc

      {
      "compatibility_date": "2026-03-24",
      "browser": {
      "binding": "BROWSER"
      }
      }
    • wrangler.toml

      compatibility_date = "2026-03-24"
      [browser]
      binding = "BROWSER"

    Then call any Quick Action directly from your Worker. For example, to capture a screenshot:

    • JavaScript

      const screenshot = await env.BROWSER.quickAction("screenshot", {
      url: "https://www.cloudflare.com/",
      });
    • TypeScript

      const screenshot = await env.BROWSER.quickAction("screenshot", {
      url: "https://www.cloudflare.com/",
      });

    The quickAction() method requires a compatibility date of 2026-03-24 or later.

    For setup instructions and the full list of available actions, refer to Browser Run Quick Actions.

  • Cloudflare Images – Transformation flows in Images

    Custom flow configuration panel

    Flows are automated rules that pair conditions (such as file extension, URL path, or query parameter) with parameters. Set up a flow to automatically apply image optimization to matching requests on your zone without writing code or changing URLs.

    There are two modes for transformation flows:

    • Provider flows — Migrate from another image optimization service. Your existing URLs continue to work while Cloudflare rewrites provider-specific parameters to their Cloudflare equivalents. Currently, Cloudflare supports provider flows for Fastly Image Optimizer.
    • Custom flows — Define your own conditions and actions for use cases like automatic format conversion, responsive sizing with width=auto, or directory-based optimization.

    To get started, go to Images > Transformations > Automation in the Cloudflare dashboard.

    Learn more about transformation flows.

  • Flagship – Flagship now in public beta

    Flagship is now in public beta. Evaluate feature flags directly from Cloudflare Workers with no outbound HTTP calls, using globally distributed flag configuration backed by Workers KV and Durable Objects. Flagship supports typed flag values, targeting rules, percentage rollouts, audit history, and OpenFeature-compatible SDKs.

    Evaluate a flag from a Worker in a few lines of code:

    • JavaScript

      export default {
      async fetch(request, env) {
      const showNewCheckout = await env.FLAGS.getBooleanValue(
      "new-checkout",
      false,
      );
      return new Response(showNewCheckout ? "New checkout" : "Standard checkout");
      },
      };
    • TypeScript

      export default {
      async fetch(request: Request, env: Env): Promise<Response> {
      const showNewCheckout = await env.FLAGS.getBooleanValue("new-checkout", false);
      return new Response(
      showNewCheckout ? "New checkout" : "Standard checkout",
      );
      },
      } satisfies ExportedHandler<Env>;

    Start creating flags from the Cloudflare dashboard today. Refer to the Flagship documentation to get started.

  • Workers VPC – Reach Cloudflare WAN destinations from Workers VPC

    You can now use VPC Network bindings with network_id: "cf1:network" to reach your full private network from Workers, including:

    This means a single VPC Network binding can route Worker requests to private services regardless of how those services are connected to Cloudflare: through a Cloudflare Tunnel from a cloud VPC, a Mesh node on a private subnet, or a Cloudflare WAN on-ramp from your data center or branch site.

    • wrangler.jsonc

      {
      "vpc_networks": [
      {
      "binding": "PRIVATE_NETWORK",
      "network_id": "cf1:network",
      "remote": true,
      },
      ],
      }
    • wrangler.toml

      [[vpc_networks]]
      binding = "PRIVATE_NETWORK"
      network_id = "cf1:network"
      remote = true

    At runtime, the URL you pass to fetch() determines the destination:

    // Reach a service behind a Cloudflare WAN IPsec on-ramp
    const response = await env.PRIVATE_NETWORK.fetch("http://10.50.0.100:8080/api");

    For configuration options, refer to VPC Networks.

  • Cloudflare Fundamentals, Cloudflare One, Cloudflare Tunnel for SASE, Cloudflare Tunnel, Cloudflare Mesh – Granular permissions for Cloudflare Tunnel and Cloudflare Mesh

    You can now scope Cloudflare permissions to individual Cloudflare Tunnel instances and Cloudflare Mesh nodes. Administrators can delegate access to specific Tunnels or Mesh nodes without granting account-wide control over private networking.

    What is new

    When you add a member or create a permission policy, the resource picker now lists Cloudflare Tunnel instances and Cloudflare Mesh nodes as scopable resource types. You can:

    • Grant a read-only role on a single Cloudflare Tunnel instance to a support operator for log streaming and diagnostics — without exposing other Tunnels or destructive actions.
    • Grant a write role on a specific Cloudflare Mesh node to an application team — without giving them access to the rest of your private network.
    • Scope a single policy to one or many Tunnels and Mesh nodes at once.

    How it works

    Granular permissions are a parallel layer to existing account-level roles — they do not replace them.

    • Existing account-level roles continue to work. A member with Cloudflare Access or Cloudflare Zero Trust retains write access to every Tunnel and Mesh node in the account. This ensures backward compatibility for existing automation and tokens.
    • Granular permissions are additive. For any API request on a specific Tunnel or Mesh node, access is granted if the principal has either the account-level role or a granular permission for that resource.
    • Resource enumeration is authorization-aware. Listing endpoints (GET /accounts/{id}/cfd_tunnel, GET /accounts/{id}/warp_connector) return only the resources the principal has at least read access to.

    Get started

  • AI Gateway – Call any AI model through AI Gateway’s new REST API

    AI Gateway now uses the AI REST API on api.cloudflare.com. You can call any model — whether from OpenAI, Anthropic, Google, or hosted on Workers AI — through one unified API, using the same endpoints and authentication regardless of provider. Four endpoints are available:

    • POST /ai/run — universal endpoint for all models and modalities
    • POST /ai/v1/chat/completions — OpenAI SDK compatible
    • POST /ai/v1/responses — OpenAI Responses API compatible
    • POST /ai/v1/messages — Anthropic SDK compatible
    curl -X POST "https://api.cloudflare.com/client/v4/accounts/$CLOUDFLARE_ACCOUNT_ID/ai/v1/chat/completions"
    --header "Authorization: Bearer $CLOUDFLARE_API_TOKEN"
    --header "Content-Type: application/json"
    --data '{
    "model": "openai/gpt-5.5",
    "messages": [{"role": "user", "content": "What is Cloudflare?"}]
    }'

    All AI Gateway features — logging, caching, rate limiting, and guardrails — are applied automatically. Third-party models are billed through Unified Billing, so you do not need to manage separate provider API keys.

    Third-party model requests are routed through your account’s default gateway, which is created automatically on first use. To route requests through a specific gateway, add the cf-aig-gateway-id header.

    If you are already calling Workers AI models through the existing REST API, that path (/ai/run/@cf/{model}) continues to work. To call Workers AI models through AI Gateway, use the @cf/ model prefix (for example, @cf/moonshotai/kimi-k2.6) and include the cf-aig-gateway-id header to specify which gateway to route through.

    For more details and examples, refer to the REST API documentation.