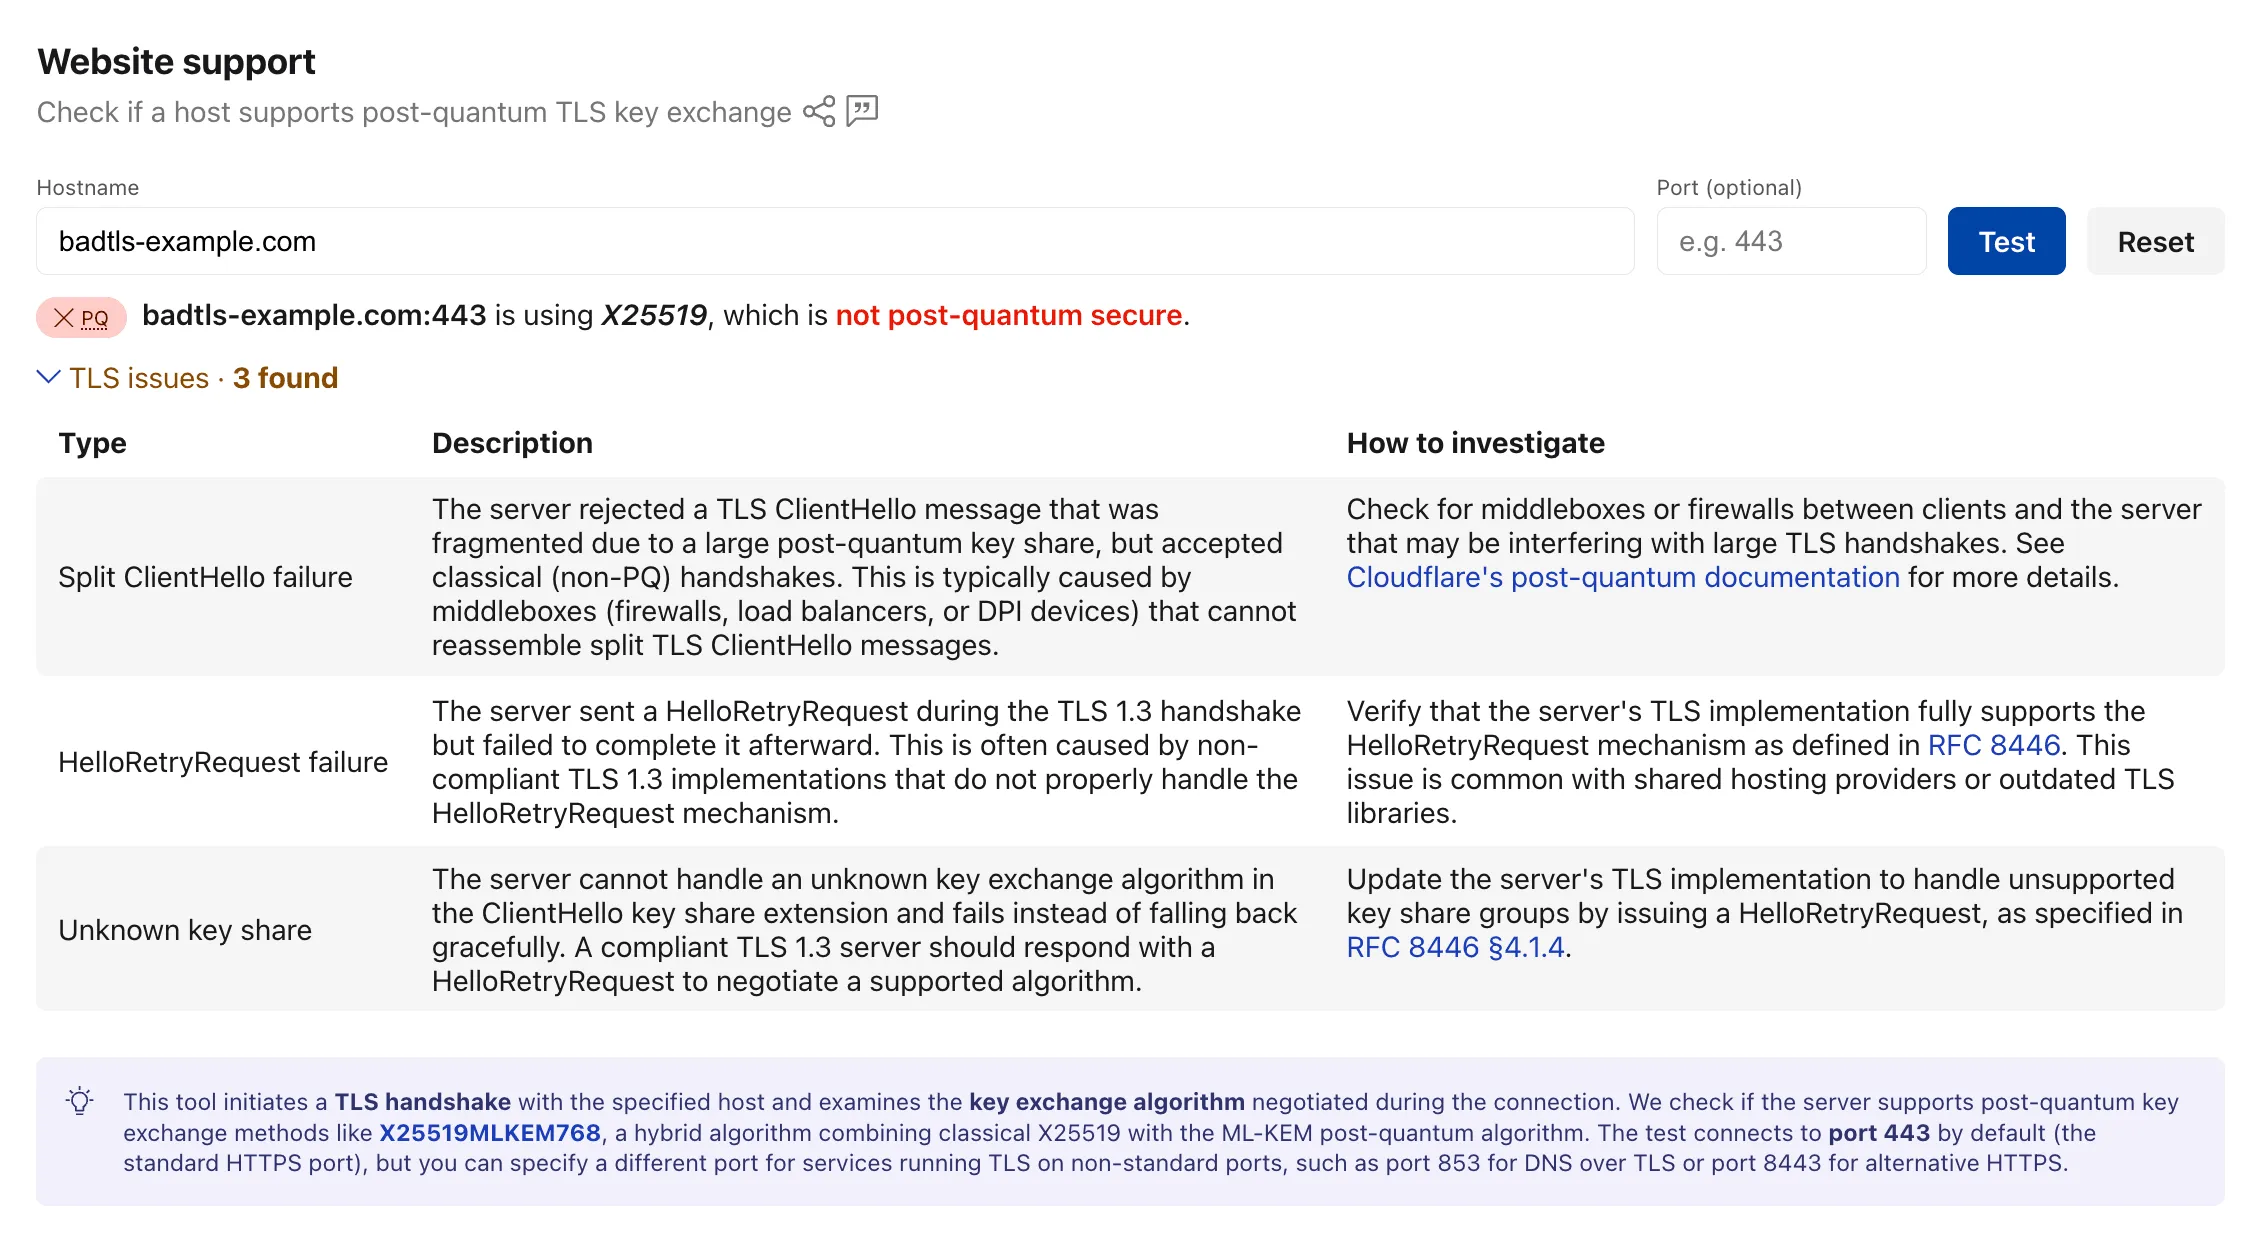
The Radarpost-quantum TLS support checker now also reports TLS bugs detected during the handshake test. When a scanned host exhibits compatibility issues, the results include details on the specific bugs detected, along with guidance on how to investigate and remediate each issue. The bugs section only appears for hosts where issues are found.
The following TLS bugs are detected:
Split ClientHello — The connection fails with a fragmented post-quantum ClientHello but succeeds with classical handshakes. Typically caused by middleboxes or firewalls that cannot reassemble split TLS messages.
HRR Failure — The server sends a HelloRetryRequest but fails to complete the handshake afterward.
Unknown Keyshare — The server cannot handle unknown key exchange algorithms and fails instead of responding with a HelloRetryRequest as required by the TLS 1.3 specification.
Sandboxes can expose a service running inside the container on a public preview URL through the sandbox.tunnels namespace. The SDK uses cloudflared inside the sandbox so you can share a running service without configuring exposePort() or a custom domain.
By default, sandbox.tunnels.get(port) creates a quick tunnel on a zero-config *.trycloudflare.com URL — no Cloudflare account, DNS record, or custom domain required. This is perfect for quick development and for .workers.dev deployments.
For more control you can create a named tunnel through sandbox.tunnels.get(port, { name }). A named tunnel binds a hostname (<name>.<your-zone>) backed by a Cloudflare Tunnel and a CNAME record on your zone resulting in something like https://my-app-preview.example.com.
Unlike quick tunnels, which generate a new random URL each time, a named tunnel produces a persistent URL that survives container restarts. This makes named tunnels suitable for production use cases where you want control over the tunnel and it’s origin.
Calling sandbox.destroy() tears down the Cloudflare Tunnel and the associated DNS record alongside the container, so you do not leave dangling tunnels or records behind.
You can now call Browser Run Quick Actions directly from a Cloudflare Worker using the quickAction() method on the browser binding. This simplifies how Workers interact with Browser Run by removing the need for API tokens or external HTTP requests. Your Worker communicates with Browser Run directly over Cloudflare’s network, resulting in simpler code and lower latency.
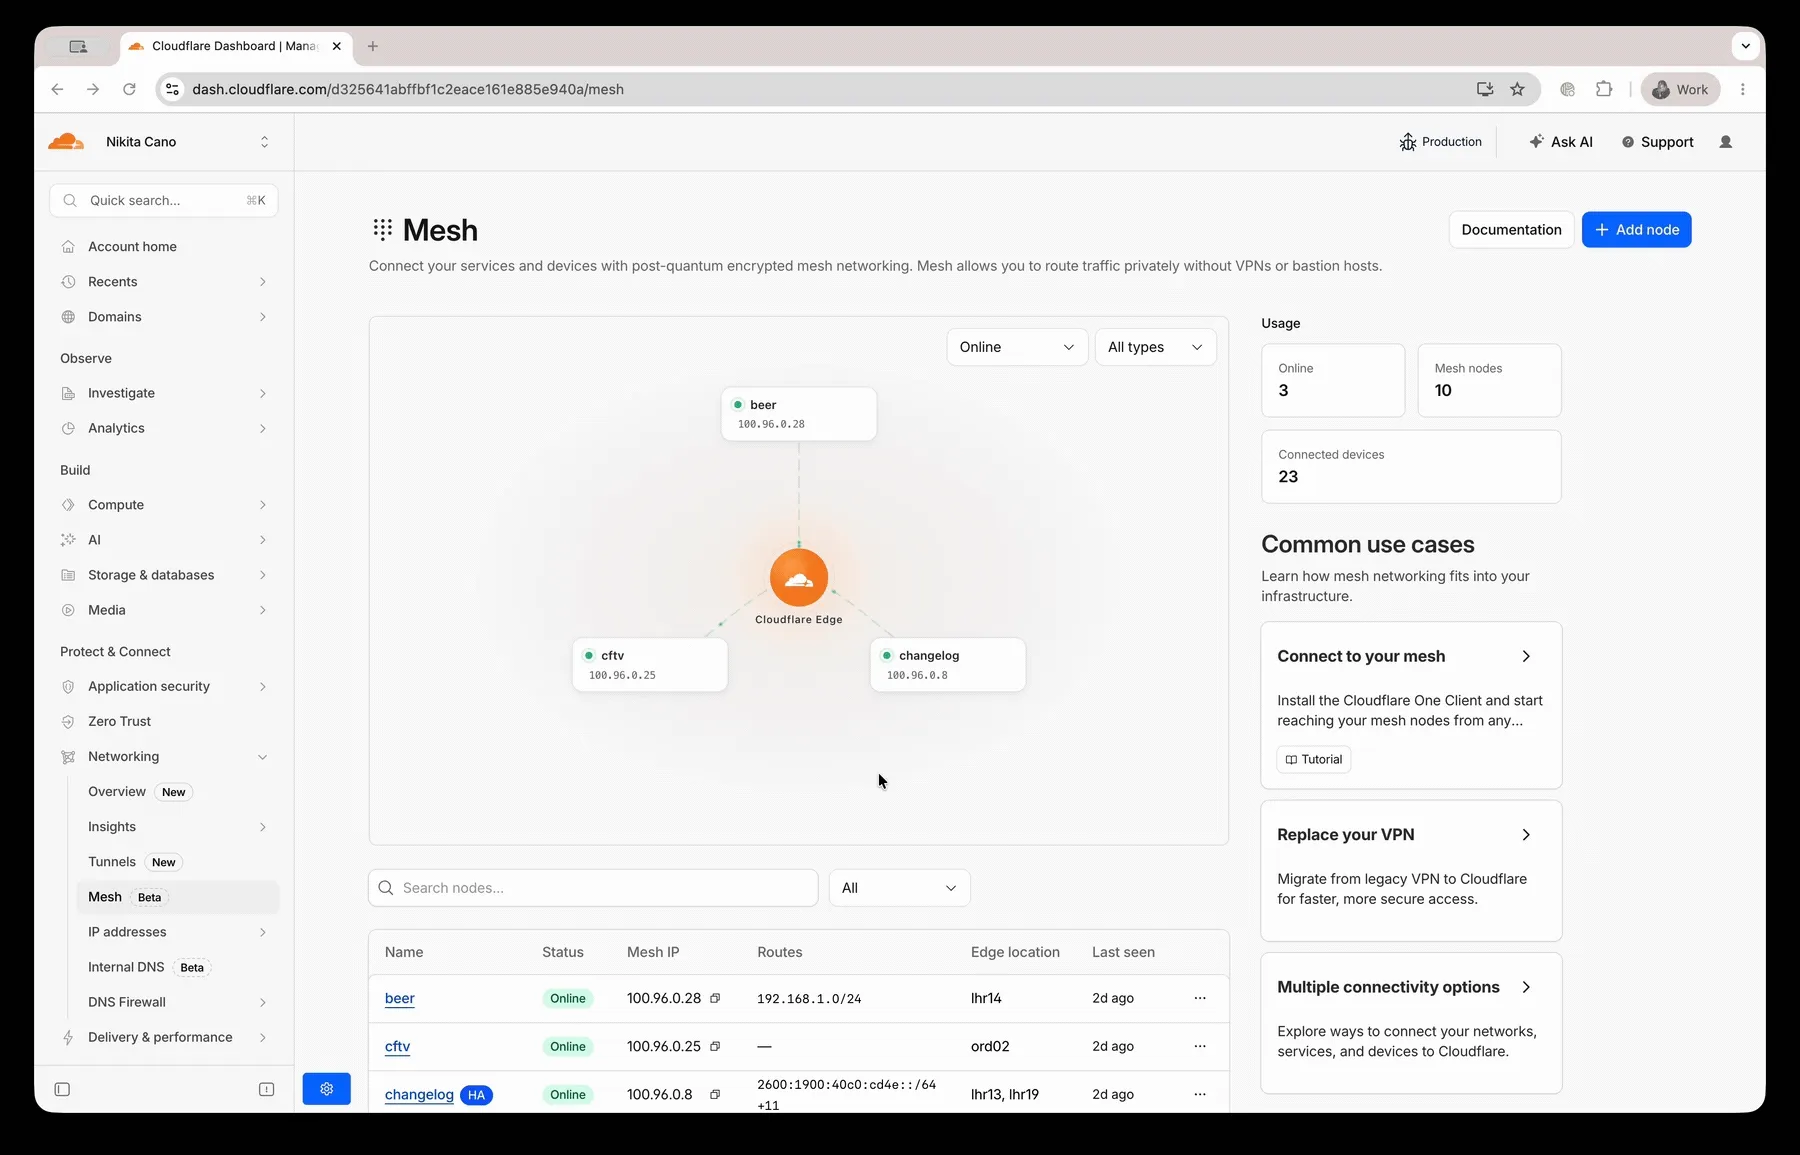
The Cloudflare Mesh dashboard now shows per-replica details for high availability nodes. You can see which replica is active, view each replica’s Mesh IP and connection details, and manually trigger failover — all from the node detail page.
What’s new
Replica tabs on the node detail page — switch between replicas to see each one’s Mesh IP, edge data center, origin IP, platform, version, and uptime.
Active/passive badges identify which replica is currently routing traffic.
Manual failover — promote a passive replica to active with a single click. The previous active replica switches to standby.
HA badge in the overview table identifies nodes running multiple replicas.
Active replica IP shown in the overview table — the dashboard now resolves which replica is active and displays the correct Mesh IP.
You can now call Browser Run Quick Actions directly from a Cloudflare Worker using the quickAction() method on the browser binding. This simplifies how Workers interact with Browser Run by removing the need for API tokens or external HTTP requests. Your Worker communicates with Browser Run directly over Cloudflare’s network, resulting in simpler code and lower latency.
The Cloudflare Mesh dashboard now shows per-replica details for high availability nodes. You can see which replica is active, view each replica’s Mesh IP and connection details, and manually trigger failover — all from the node detail page.
What’s new
Replica tabs on the node detail page — switch between replicas to see each one’s Mesh IP, edge data center, origin IP, platform, version, and uptime.
Active/passive badges identify which replica is currently routing traffic.
Manual failover — promote a passive replica to active with a single click. The previous active replica switches to standby.
HA badge in the overview table identifies nodes running multiple replicas.
Active replica IP shown in the overview table — the dashboard now resolves which replica is active and displays the correct Mesh IP.
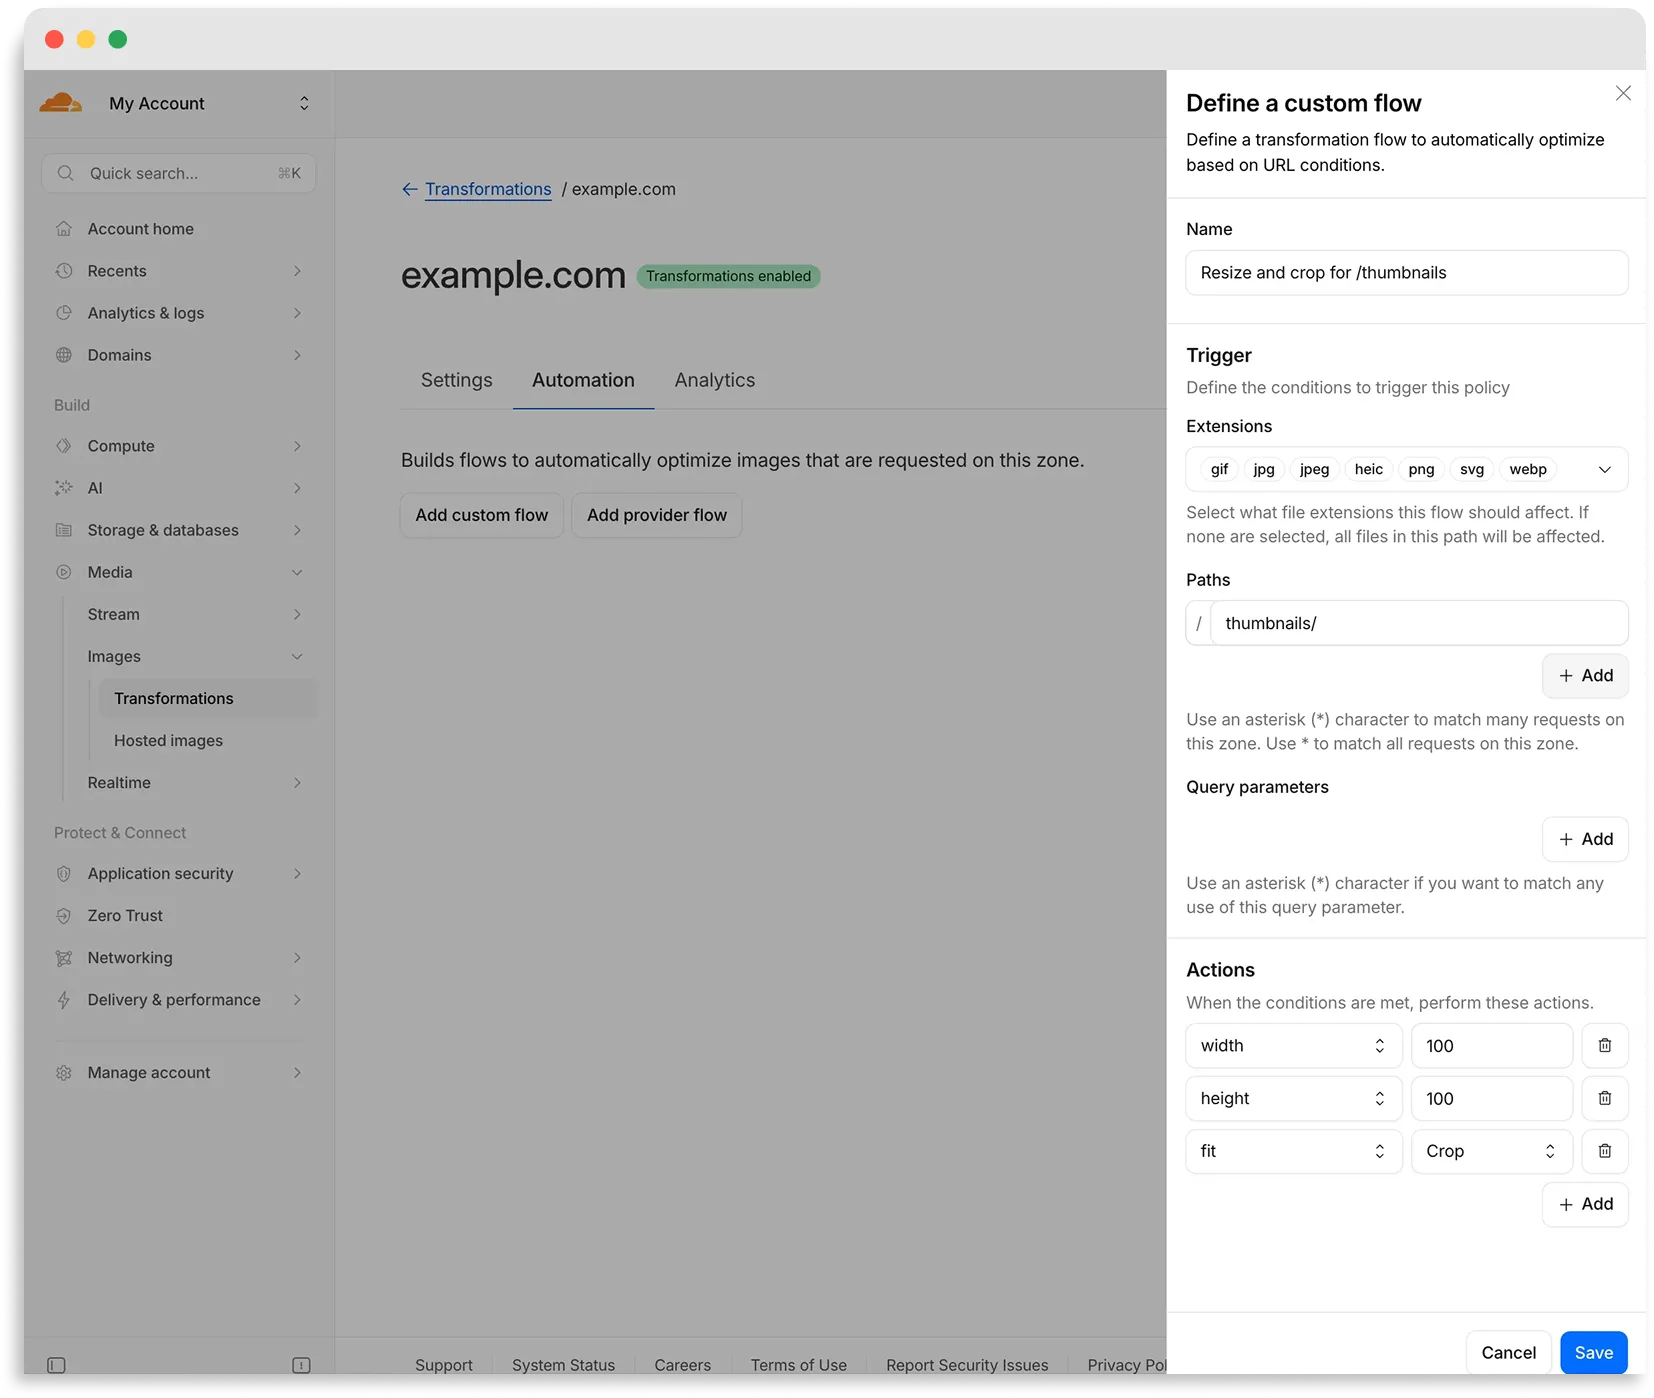
Flows are automated rules that pair conditions (such as file extension, URL path, or query parameter) with parameters. Set up a flow to automatically apply image optimization to matching requests on your zone without writing code or changing URLs.
There are two modes for transformation flows:
Provider flows — Migrate from another image optimization service. Your existing URLs continue to work while Cloudflare rewrites provider-specific parameters to their Cloudflare equivalents. Currently, Cloudflare supports provider flows for Fastly Image Optimizer.
Custom flows — Define your own conditions and actions for use cases like automatic format conversion, responsive sizing with width=auto, or directory-based optimization.
To get started, go to Images > Transformations > Automation in the Cloudflare dashboard.