You can now navigate, switch context, and take common actions in the Cloudflare dashboard without leaving your keyboard. Press ? anywhere to see the full list. Keyboard shortcuts can be disabled by visiting your profile settings.
Navigate
Shortcut
Action
g h
Go to Home
g a
Go to account overview
g z
Go to zone overview
g p
Go to your profile
g w
Go to Workers & Pages
g o
Go to Zero Trust
g b
Go to billing
g 1 – g 5
Go to a recent or pinned item (by position in sidebar)
Cloudflare Pipelines ingests streaming data via Workers or HTTP endpoints, transforms it with SQL, and writes it to R2 as Apache Iceberg tables. R2 Data Catalog manages those Iceberg tables, compaction, and compatibility with query engines like R2 SQL, Spark, and DuckDB.
This adds four new resources that let you define your entire data pipeline as infrastructure-as-code: a data catalog, a stream for ingestion, a sink that writes to R2 Data Catalog or R2, and a pipeline that connects them with SQL.
sql="INSERT INTO ${cloudflare_pipeline_sink.my_sink.name} SELECT * FROM ${cloudflare_pipeline_stream.my_stream.name}"
}
For a full end-to-end example that includes R2 bucket creation, data catalog setup, and scoped API token provisioning, refer to the Pipelines Terraform documentation.
Cloudflare’s cache now runs on a new proxy built on Pingora, the Rust-based framework that already serves a significant portion of Cloudflare’s network traffic. The new proxy is faster, more memory-safe, and designed to evolve our cache architecture. It delivers immediate performance improvements and enables new caching capabilities.
What this brings
Lower latency: The new proxy reduces per-request overhead through improved connection reuse.
Foundation for future features: The new architecture enables upcoming improvements to cache functionality and efficiency.
New features
Asynchronous stale-while-revalidate: Every request returns stale content immediately while revalidation happens in the background, instead of the first request after expiry blocking on the origin. Refer to the asynchronous stale-while-revalidate changelog for details.
Unbuffered bypass by default: Responses that bypass cache are streamed directly to the client without buffering, reducing time-to-first-byte for uncacheable content.
Behavioral changes
The new architecture introduces the following behavioral changes to improve RFC compliance and correctness:
Vary: * results in cache bypass: According to RFC 9110 Section 12.5.5, a Vary header value of * indicates the response varies on factors beyond request headers and must not be served from cache. Cloudflare now bypasses cache for these responses instead of storing them.
Set-Cookie stripped on MISS and EXPIRED: For cacheable assets, Set-Cookie is now stripped on MISS and EXPIRED responses, not only on HITs.
Floating-point TTL values: Floating-point time-to-live values (for example, max-age=1.5) are rounded down to the nearest integer instead of being rejected as invalid.
What’s next
A deeper look at the new cache proxy is coming soon to the Cloudflare blog. For background on the underlying framework, read:
The Worker Loader loads Dynamic Workers on demand, which previously made durability challenging. Even within a Dynamic Worker, a Workflow might sleep for hours or days between steps, and by the time it resumes, the original Dynamic Worker code would no longer be in memory.
The library solves this by tagging each Workflow instance with metadata that identifies which Dynamic Worker to load — for example, a tenant ID — then reloading the matching Dynamic Worker through the Worker Loader whenever a Workflow awakens.
Because Dynamic Workers are created on-demand, you do not have to register each Workflow up front or manage them individually. Load the Workflow code in the Dynamic Worker when it is needed, and the Workflows engine handles persistence and retries behind the scenes. Your Workflow code itself is unaffected by the routing and behaves as normal.
This unlocks patterns where the Workflow code itself is dynamic. For example, this is useful with:
SaaS platforms where each tenant defines their own automation, such as onboarding sequences, approval chains, or billing retry logic.
AI agent frameworks where agents generate and execute multi-step plans at runtime, surviving restarts and waiting for human approval between tool calls.
Multi-tenant job systems where each customer submits their own processing logic and every step persists progress and retries on failure.
Cloudflare DLP now includes Data Classification, which lets administrators organize and label sensitive content using labels, templates, and reusable data classes.
With Data Classification, administrators can define labels such as sensitivity schemas and levels, and data tag groups and tags. Administrators can also build from Cloudflare-managed templates and create reusable data classes that combine detection entries, other data classes, sensitivity levels, and data tags.
You can then use those classifications in custom DLP profiles to identify the severity of sensitive content, understand where it exists, and apply that logic consistently across DLP profiles.
Cloudflare IPsec now supports post-quantum key agreement with compatible third-party devices. Cisco and Fortinet are the first third-party vendors validated to interoperate with Cloudflare IPsec using ML-KEM (Module-Lattice-Based Key-Encapsulation Mechanism).
Post-quantum IPsec uses RFC 9370 and draft-ietf-ipsecme-ikev2-mlkem to negotiate hybrid key agreement during the IKEv2 IKE_INTERMEDIATE phase. This combines classical Diffie-Hellman (Group 20) with ML-KEM-768 or ML-KEM-1024 to protect against harvest-now, decrypt-later attacks.
Key details:
Compatible with Cisco 8000 Series Secure Routers with IOS XR Release 26.1.1 and Fortinet FortiOS 7.6.6 and later.
Uses ML-KEM-768 or ML-KEM-1024 as an additional Key Exchange to DH Group 20.
Follows RFC 9370 and draft-ietf-ipsecme-ikev2-mlkem standards.
No additional licensing required.
Post-quantum IPsec with third-party devices is now generally available with confirmed interoperability for the platforms listed above. Cloudflare intends to support interoperability with more vendors as they build out support for draft-ietf-ipsecme-ikev2-mlkem. Contact your account team to discuss support for additional vendors.
For supported key exchange methods and the list of validated platforms, refer to GRE and IPsec tunnels.
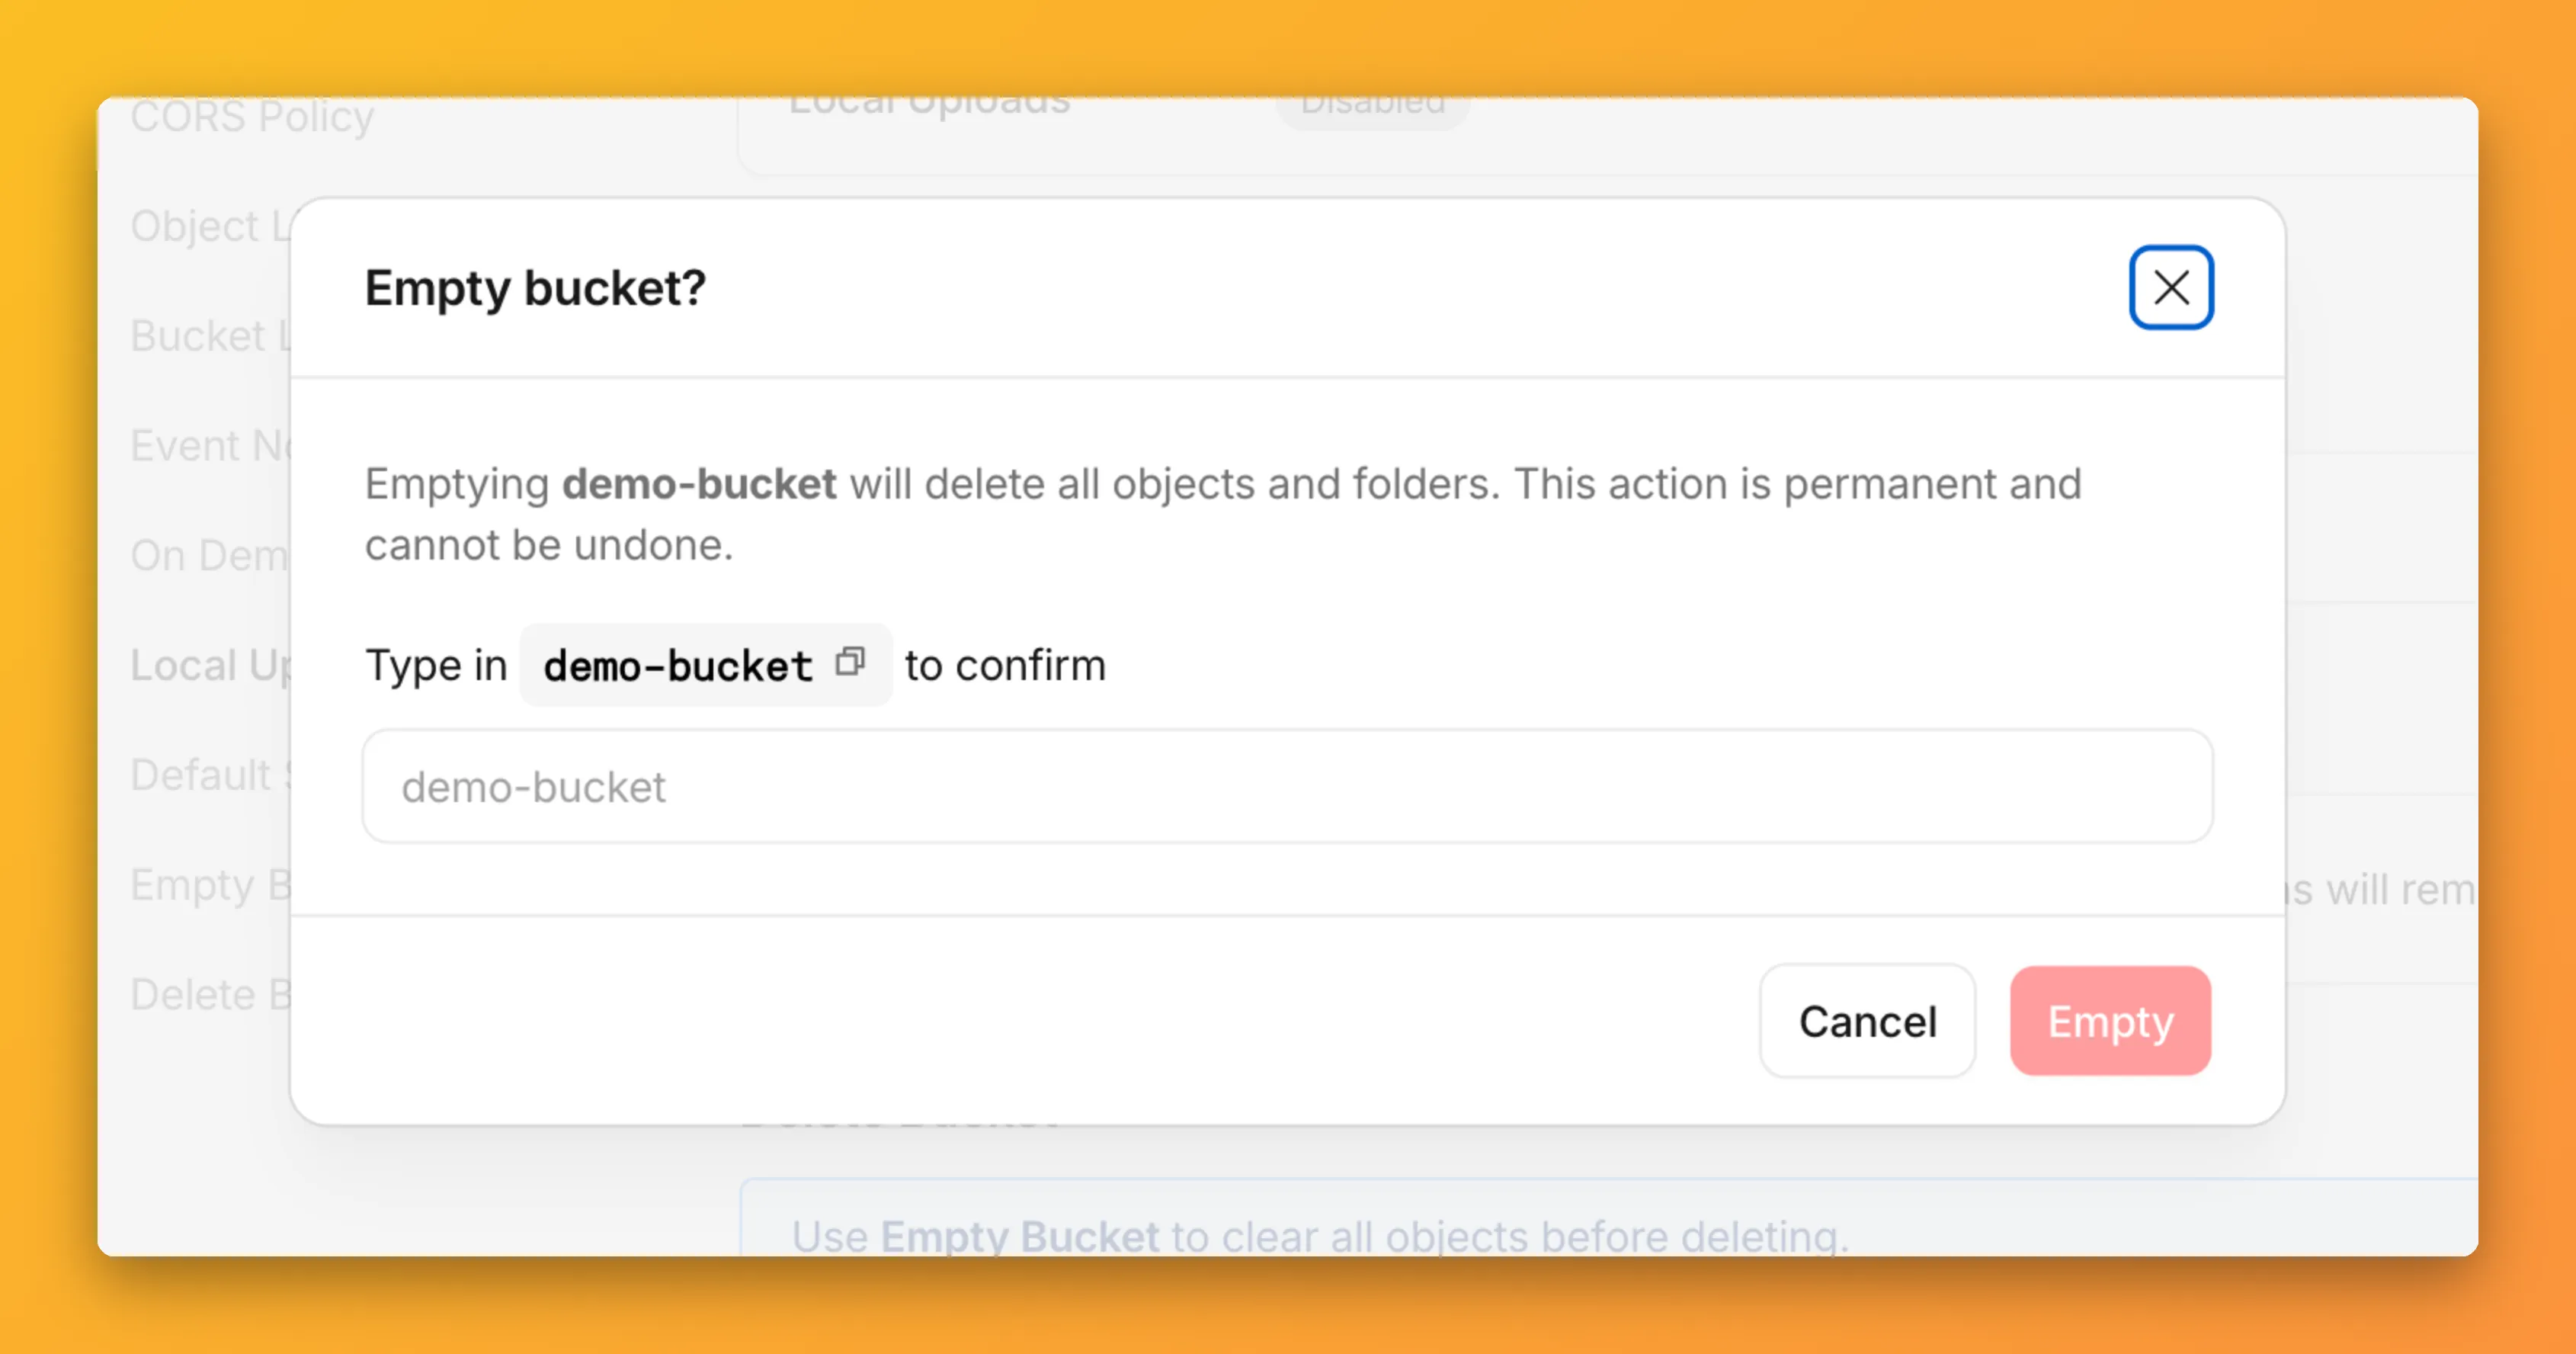
You can now empty an entire R2 bucket or delete folders directly from the dashboard. Emptying a bucket is required before you can delete it. Previously, this required scripting or configuring lifecycle rules. Now, the dashboard can handle it in a single action.
Empty a bucket
Go to your bucket’s Settings tab and select Empty under the Empty Bucket section. This deletes all objects in the bucket while preserving the bucket and its configuration. For large buckets, the operation runs in the background and the dashboard displays progress.
Emptying a bucket is also a prerequisite for deleting it. The dashboard now guides you through both steps in one place.
Delete folders
R2 uses a flat object structure. The dashboard groups objects that share a common prefix into folders when the View prefixes as directories checkbox is selected. Deleting a folder removes every object under that prefix.
From the Objects tab, you can select one or more folders and delete them alongside individual objects.