The Audit Logs v2 UI is now available to all Cloudflare customers in Beta. This release builds on the public Beta of the Audit Logs v2 API and introduces a redesigned user interface with powerful new capabilities to make it easier to investigate account activity.
Enabling the new UI
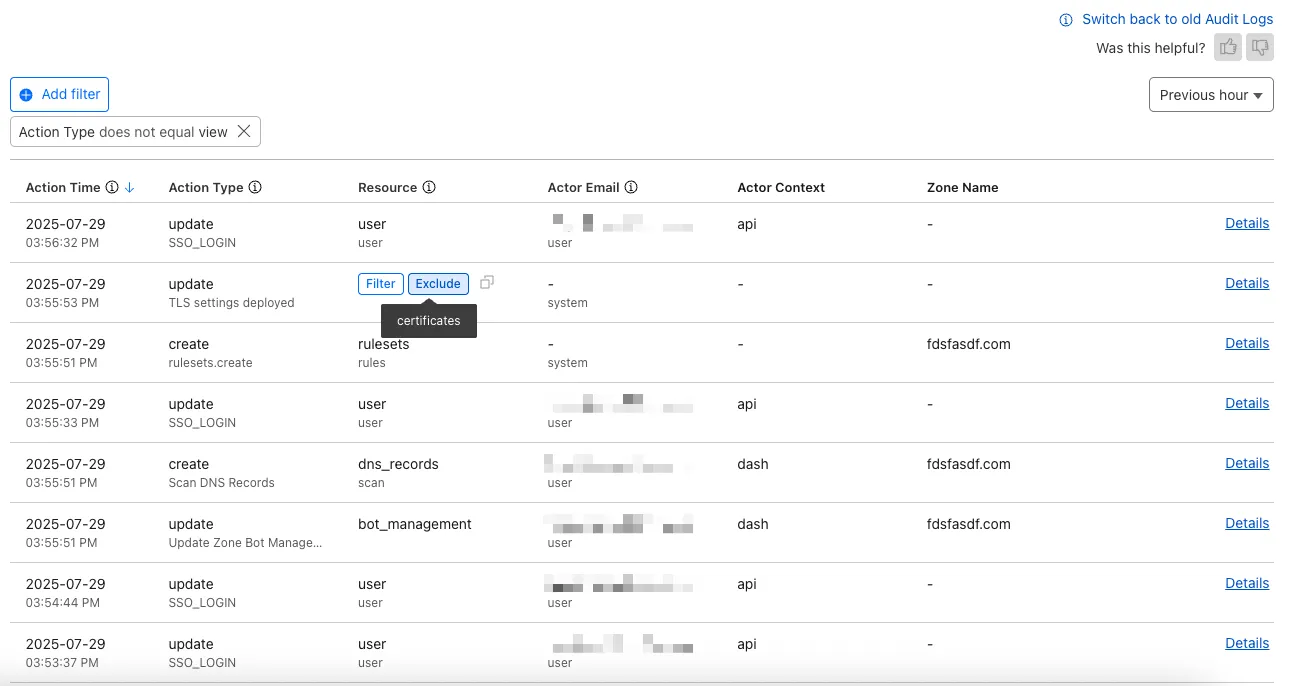
To try the new UI, go to Manage Account > Audit Logs in the Cloudflare Dashboard and click “Switch to new Audit Logs” at the top of the page.

The previous version of Audit Logs remains available and can be re-enabled at any time using the “Switch back to old Audit Logs” link in the banner at the top of the page.
New Features:
- Advanced Filtering: Filter logs by actor, resource, method, and more for faster insights.
- On-hover filter controls: Easily include or exclude values in queries by hovering over fields within a log entry.
- Detailed Log Sidebar: View rich context for each log entry without leaving the main view.
- JSON Log View: Inspect the raw log data in a structured JSON format.
- Custom Time Ranges: Define your own time windows to view historical activity.
- Infinite Scroll: Seamlessly browse logs without clicking through pages.
For more details on Audit Logs v2, see the Audit Logs documentation.
Known issues
- A small number of audit logs may currently be unavailable in Audit Logs v2. In some cases, certain fields such as actor information may be missing in certain audit logs. We are actively working to improve coverage and completeness for General Availability.
- Export to CSV is not supported in the new UI.
We are actively refining the Audit Logs v2 experience and welcome your feedback. You can share overall feedback by clicking the thumbs up or thumbs down icons at the top of the page, or provide feedback on specific audit log entries using the thumbs icons next to each audit log line or by filling out our feedback form.